- Music Therapy Gateway
- In Communications
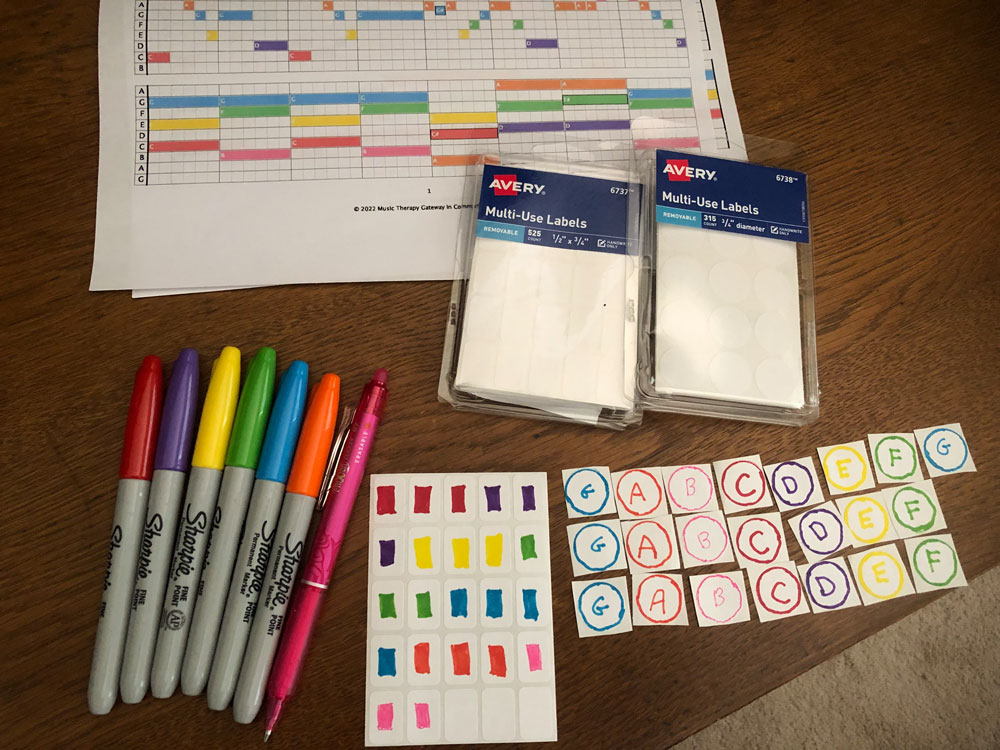
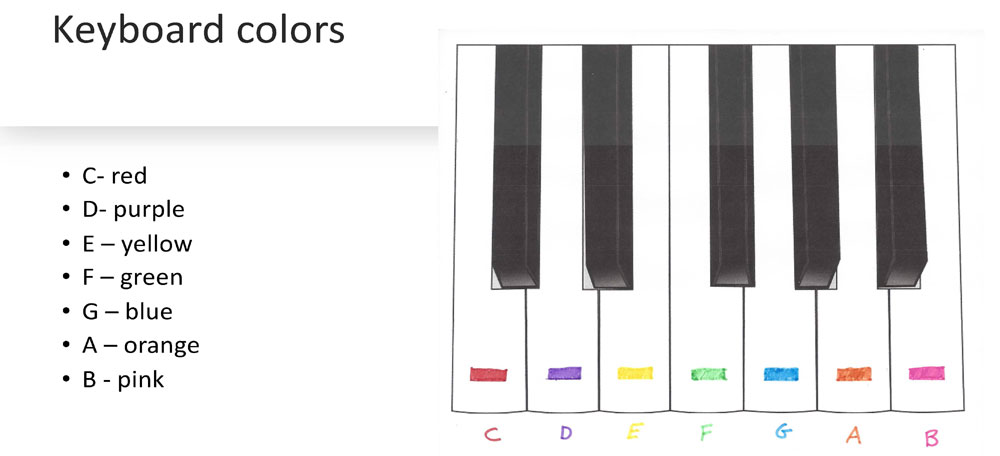
The colors being used with the Notes2Blocks charts include red, purple, yellow, green, blue, orange, and pink, in that sequence. If you can find pre-colored sitckers utilizing those colors then feel free to use those. However, it's also very easy to create your own labels if you can't find satisfactory pre-colored ones. The lable manufacturer Avery has plain white circular or rectangle sticker lables that are easily drawn on with colored pencils, Sharpies, or other coloring device. Please note, do not use larger than a three-quarter inch size lable, or it may overlap on the piano keys.
If creating your own labels, you have the option of using just using a plain block of color or of incorporating the actual musical note names along with the color if you'd like to learn about the basics of musical structure. (See picture examples below of various ways to create the visual pattern.) How simple or complex you want to make the lable is entirely based on the client preference of what is the best for them.
You will need a total of: three red (musical note C) labels, three purple (D) lables, three yellow (E) lables, three green (F) lables, four blue (G) lables, three orange (A) lables, and three pink (B) labels to cover the full range of notes used.
If you are familiar with the notes on the keyboard already, then skip down to the next section.
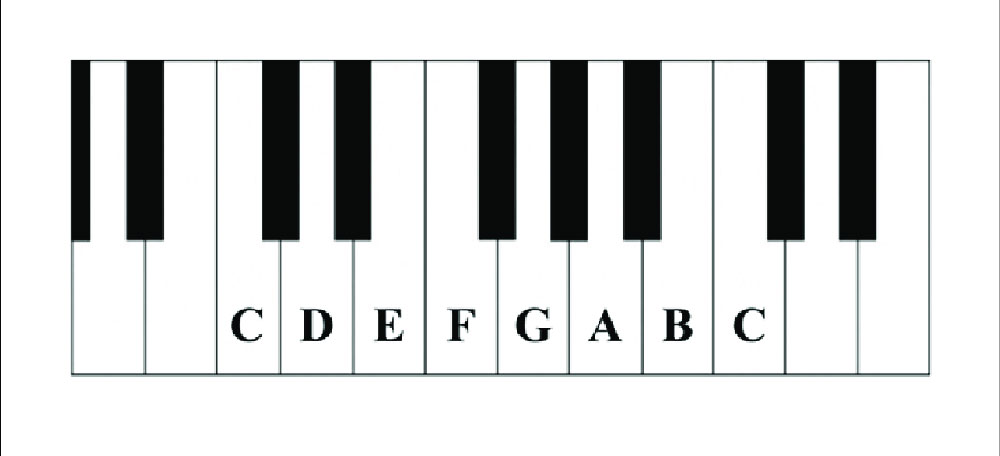
The musical alphabet is made up of a repeating set of the notes A, B, C, D, E, F, and G. Observing the piano keyboard, you'll see a series of repeating patterns of white notes and black notes. If you look closely, you will notice that the black notes form in groupings of 2, and then 3 black notes. The white note that is directly to the left of the grouping of 2 black notes is called C. Proceeding up the white notes after that, the next note to the right is D, next to the right is E, and so on. When you get to G, the pattern starts repeating so that the note to the right of G is A. Going to the right makes the notes go higher in pitch, and going to the left makes the notes go lower in pitch.
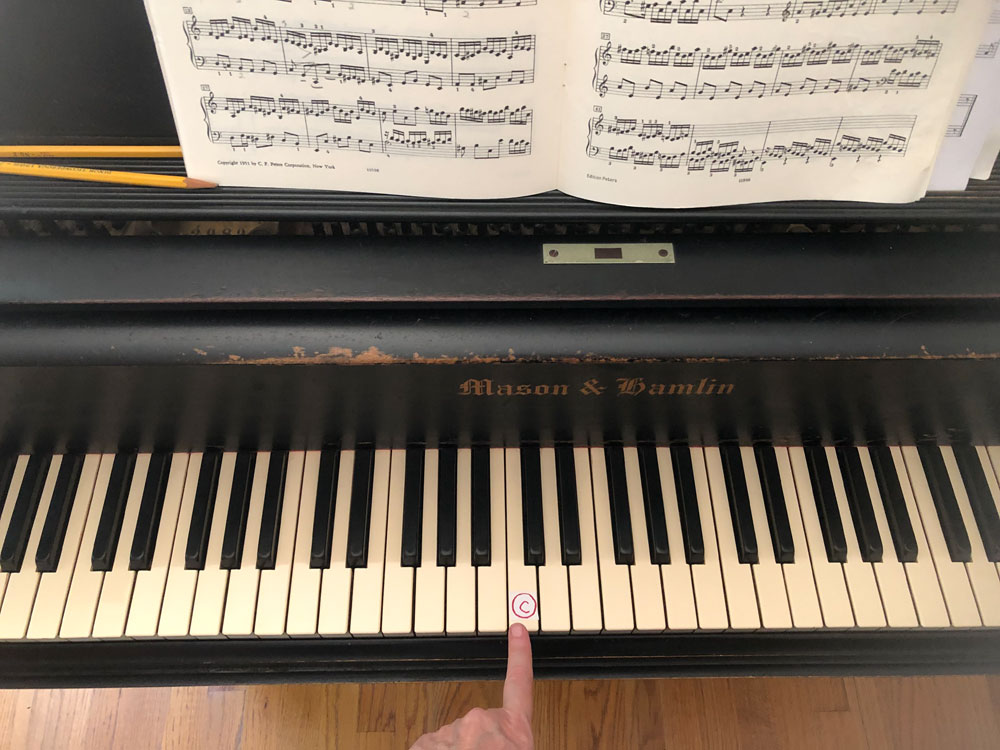
Middle C is literally the C that is in the center of the piano. If using a standard 88 key acoustic piano you can count from the bottom (left side) of the keyboard up and it will be the 4th C up. If using an electronic keyboard with a shorter number of keys, it is probably identified within the electronic content. Find middle C and label it accordingly by using one of the red colored labels.
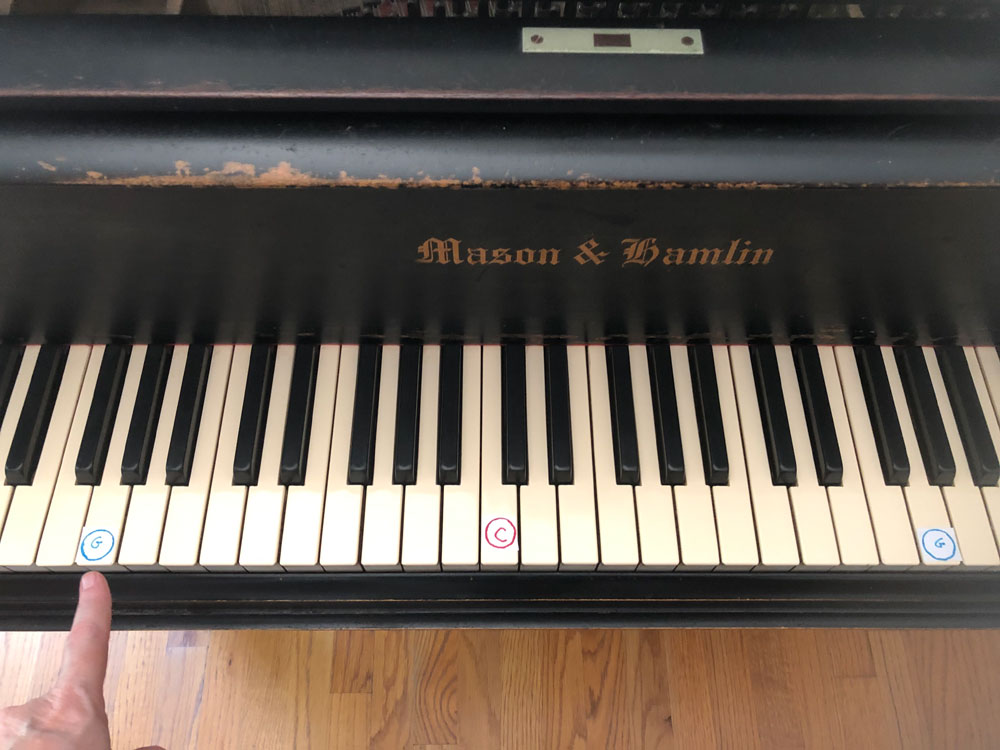
The Notes2Blocks charts are limited to a finite range, with the lowest note being the G below the C below middle C, and the highest note being the G above the C above middle C. Counting up or down from middle C, find these two Gs and label them accordingly using two of the blue labels.
You can now proceed to fill in all the labels in between. From the lowest G, the next note up with be an orange A lable, then to a pink B label, another red C label, and so on.
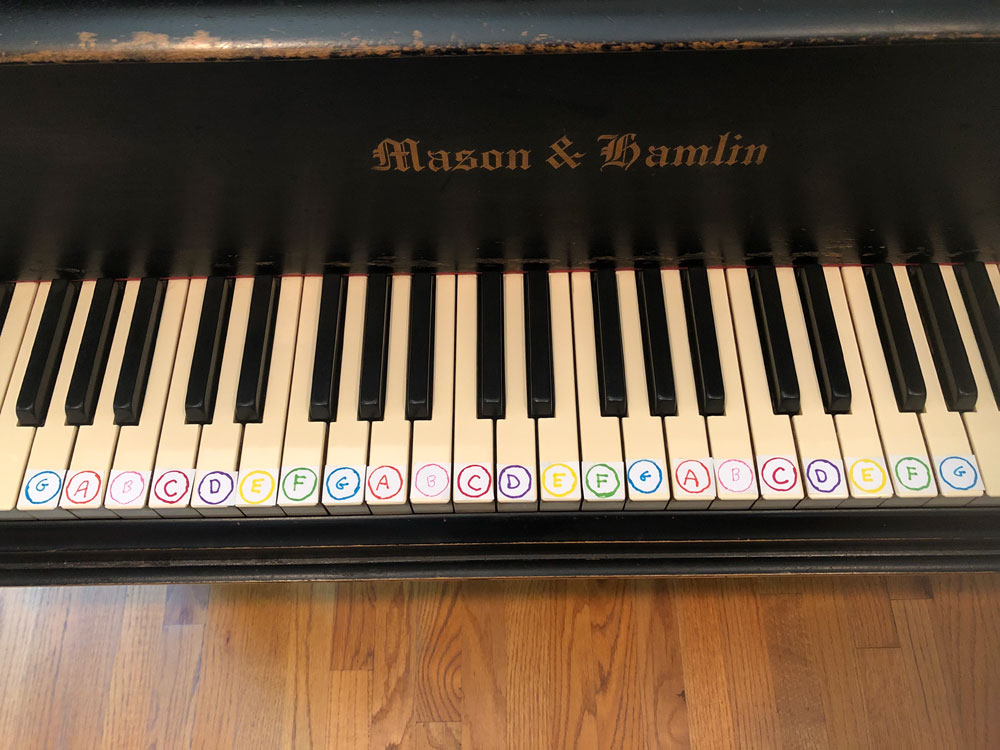
If a client is interested in learning a little bit about how musical structure works, they may be interested in setting up the labels as shown in the picture that have both the colors and also the note names on them. In this way they could gradually become acquainted with the note names also. However, there is a more "busy" visual look for this preference, so it may not be appropriate for people cognitive disabilities.
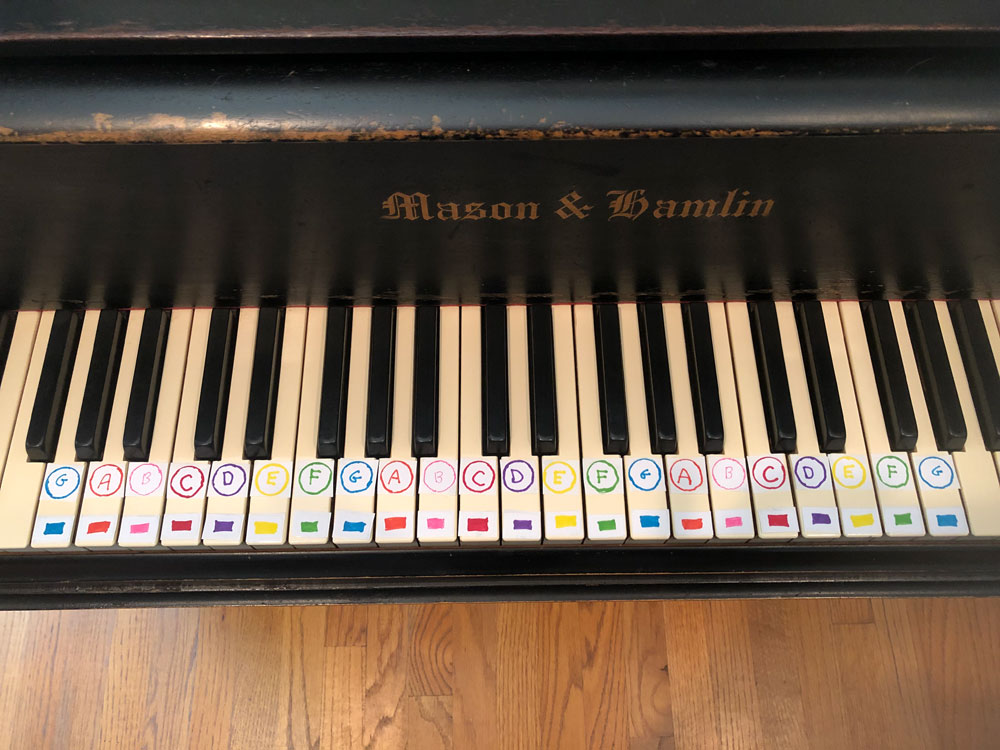
This picture shows a combined use of just a color chunk along with the note name.
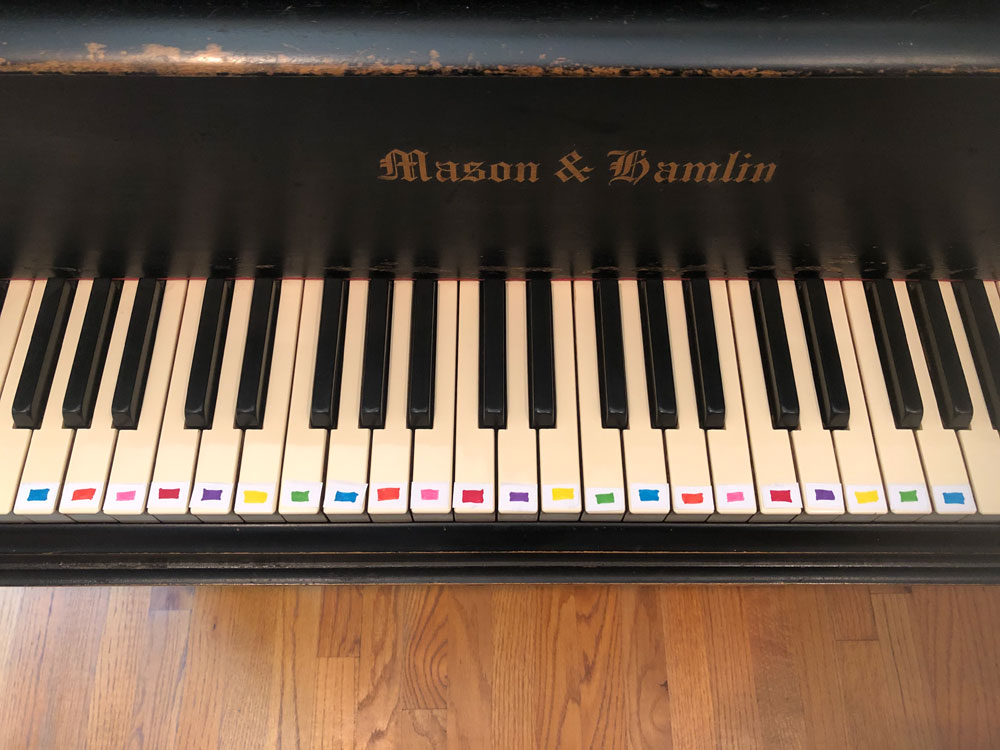
And finally, the easiest visual option that will require the least cognitive effort is use of just the color chunks.
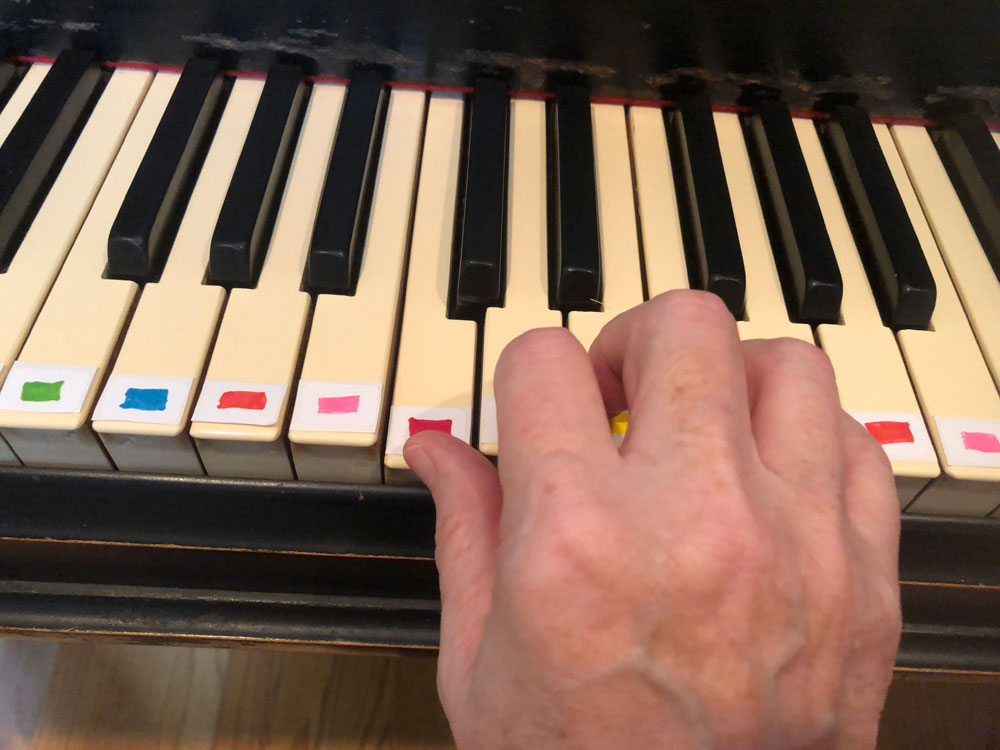
It's fine if you want to start out with just hunting and pecking the notes using one finger, you can do whatever is comfortable for you. If you choose to use all 5 fingers to play, fingering for the hands in piano defines the thumb as finger 1, and then counting out to the pinky as finger 5. To use all five fingers to play, good placement to start with is with the thumb of your right hand on middle C, with the 5th finger (pinky) of your left hand on the C below middle C. Just as a reminder, C is the red label.
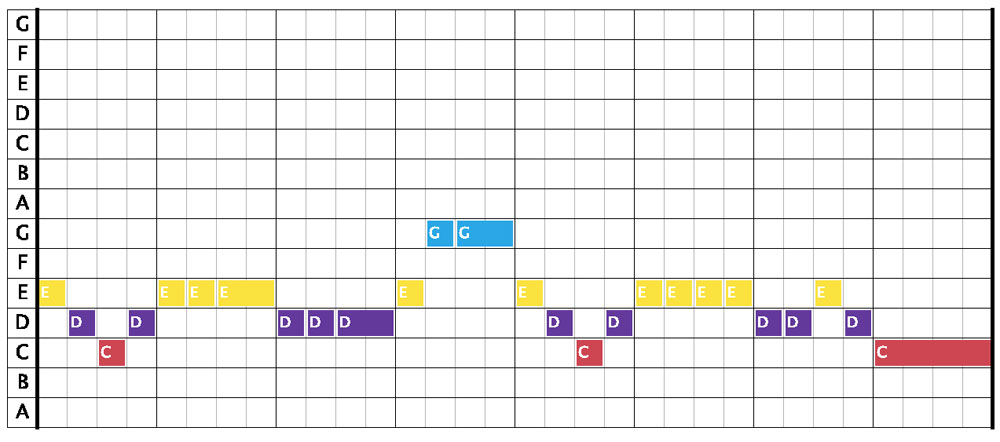
Now that the keyboard is set up and your hand placement is ready, you are ready to print or download the charts to match the colors on the graphs to the colored labels on the keyboard. Hint: the easiest song to start with is just the right hand (melody) of "Mary Had a Little Lamb."
We promote the use of music in medicine and education through many unique efforts .
Advocacy efforts to bring music into standard medical and educational practices in conference presentations
We bring together groups of medical personnel, music therapists, musicians, educators, caregivers, and IT professionals
MTGIC has created a unique performance series of solo and chamber performances to bring musicscience to the arts audience
Software has been designed that will help automate biomedical music protocols to an app for use with a mobile device
A unique open source database is being created that contains music designed specifically for therapeutic use
MTGIC personnel have authored several articles to help promote events, ideas, and the science of music and the brain